
Step-by-Step Guide: Creating D365FO Build and Deploy Pipelines
September 08, 2023
Setup Azure Build Pipeline
This guide will walk through the standard procedures for setting up a D365FO Azure-hosted build pipeline.
References
Before we begin, please refer to the following documentation for context:
- Build automation that uses Microsoft-hosted agents and Azure Pipelines
- Upload assets by using Azure Pipelines
- Create a Dynamics Lifecycle Services connection in Azure pipelines
Procedure detail
Pre-checks
Before diving into the setup, perform a few essential pre-checks:
-
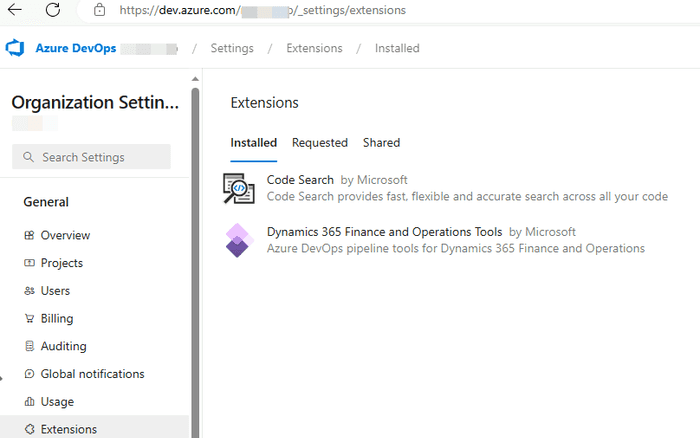
Install the «Dynamics 365 Finance and Operations Tools» extension
-
Create personal access token (az)
Navigate to DevOps > User Settings > Personal Access Tokens. Scopes: Full Access, Expiration – 1 year (maximum)
-
Create a service account user with no MFA and Application registration

Creating the Build Pipeline
-
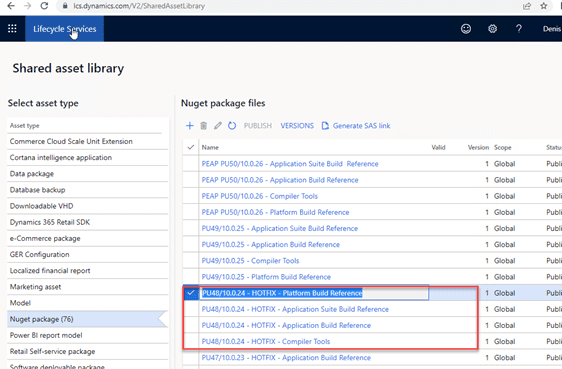
Download the 4 NuGet files to your local PC
-
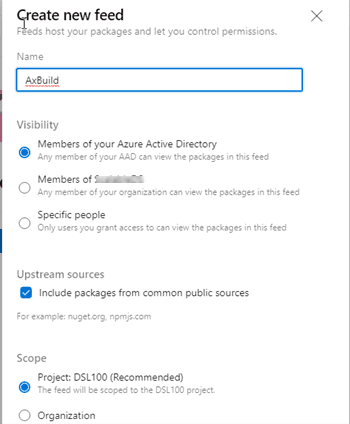
Log in to DevOps > Your Project > Artifacts > Create Feed
-
Click the Connect to Feed button and select NuGet.exe
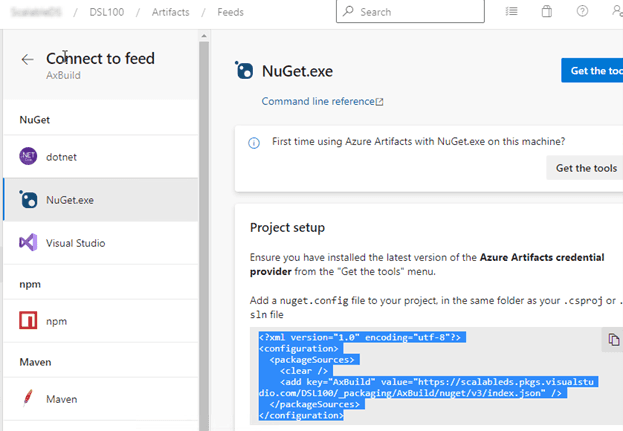
Copy the selected text and paste it into the nuget.config file in the same directory as the previous packages.
-
Click the Get the Tools button and download the latest version of nuget.exe
-
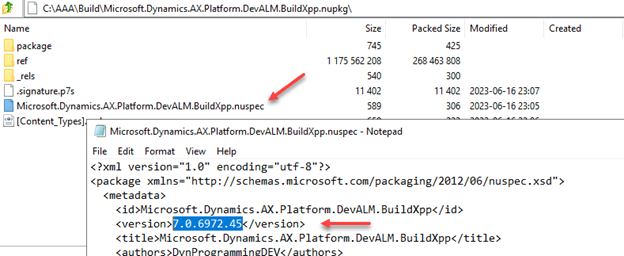
Create a new file named packages.config and add the following content (ensure correct version numbers):
<?xml version="1.0" encoding="utf-8"?>
<packages>
<package id="Microsoft.Dynamics.AX.Application.DevALM.BuildXpp" version="10.0.1084.80" targetFramework="net40" />
<package id="Microsoft.Dynamics.AX.ApplicationSuite.DevALM.BuildXpp" version="10.0.1084.80" targetFramework="net40" />
<package id="Microsoft.Dynamics.AX.Platform.CompilerPackage" version="7.0.6253.76" targetFramework="net40" />
<package id="Microsoft.Dynamics.AX.Platform.DevALM.BuildXpp" version="7.0.6253.76" targetFramework="net40" />
</packages>
Obtain the version number from the package files(there should be 2 different versions, 2 for Applications and 2 for Platform).
-
Open the command line and run the following command for each NuGet file:
nuget.exe push -Source "AxBuild" -ApiKey az C:\AAA\Build\Microsoft.Dynamics.AX.Application.DevALM.BuildXpp.nupkg
nuget.exe push -Source "AxBuild" -ApiKey az C:\AAA\Build\Microsoft.Dynamics.AX.ApplicationSuite.DevALM.BuildXpp.nupkg
nuget.exe push -Source "AxBuild" -ApiKey az C:\AAA\Build\Microsoft.Dynamics.AX.Platform.CompilerPackage.nupkg
nuget.exe push -Source "AxBuild" -ApiKey az C:\AAA\Build\Microsoft.Dynamics.AX.Platform.DevALM.BuildXpp.nupkg
When prompted, use: Username = az; Password = token value
-
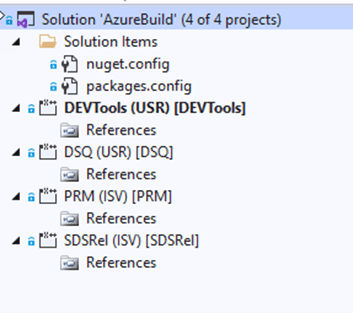
Create a new solution with an empty project for each package you want to build. No need to include nested packages. Copy nuget.config and packages.config to the solution folder.
-
Download the sample pipeline from the following GitHub account:
https://github.com/microsoft/Dynamics365-Xpp-Samples-Tools
(Note: Some users reported issue with wrong task ID, not used now - https://github.com/microsoft/Dynamics365-Xpp-Samples-Tools/pull/2/files )
-
Open a PowerShell prompt and run the following commands to create a new pipeline:
cd C:\Users\Admin05ec84c604\Downloads\Dynamics365-Xpp-Samples-Tools-master\CI-CD\Pipeline-Samples

./xpp-classic-ci-.ps1
This will create a new build pipeline.
Adjusting the Build Pipeline Parameters
Open the created pipeline and make the following adjustments:
-
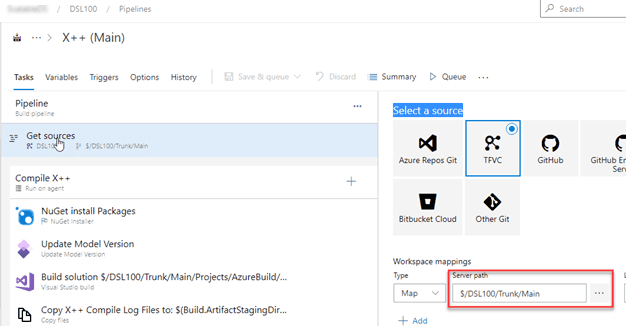
Click Get sources and specify the full path to the source code.
-
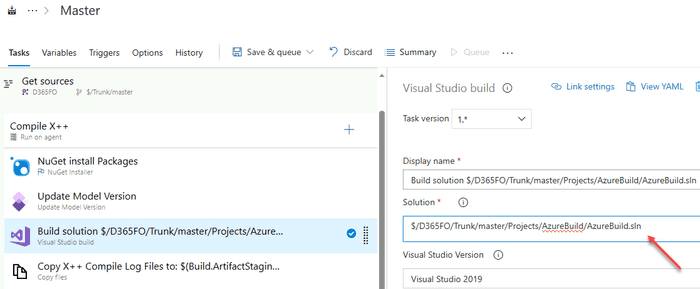
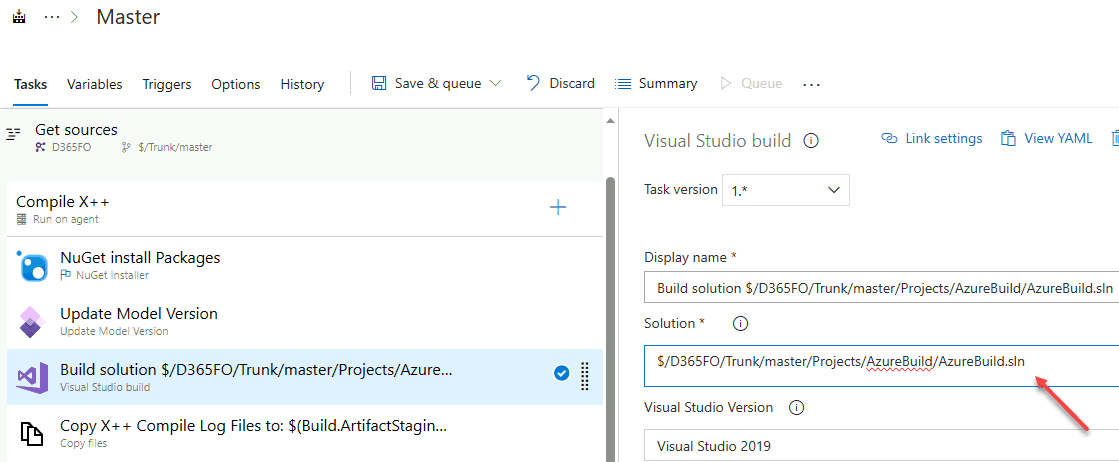
Update the path to the build Solution with empty projects:
-
Update the NugetConfigsPath path on the Variables tab to: $(Build.SourcesDirectory)\Projects\AzureBuild
-
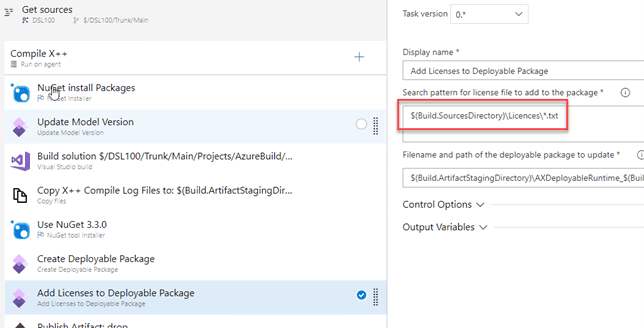
Optionally, enable the Licenses Load task:
$(Build.SourcesDirectory)\Licences*.txt
-
Run the pipeline and verify that everything is working as expected.
Updating the Build Pipeline to a new version
If you need to update a Build Pipeline to a new version follow these steps:
- Execute steps 1-6 from the Create pipeline process
- Copy nuget.config and packages.config files to the AxBuild solution folder(replace existing files).
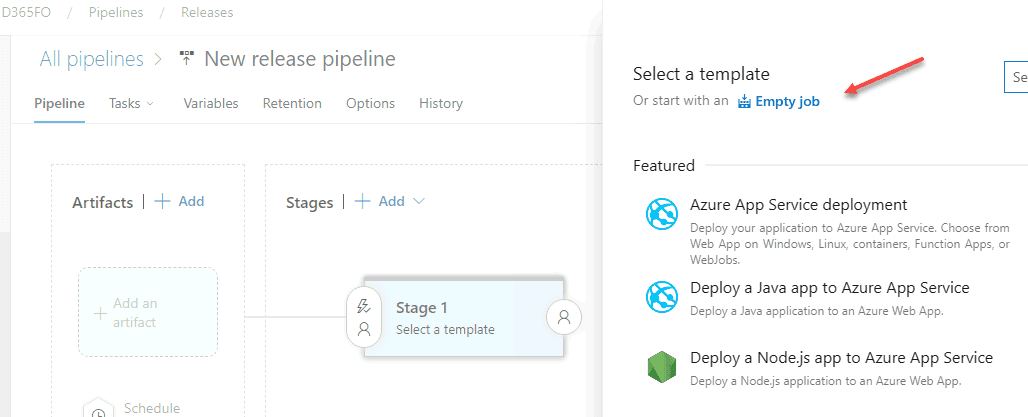
Creating a New Release Pipeline
-
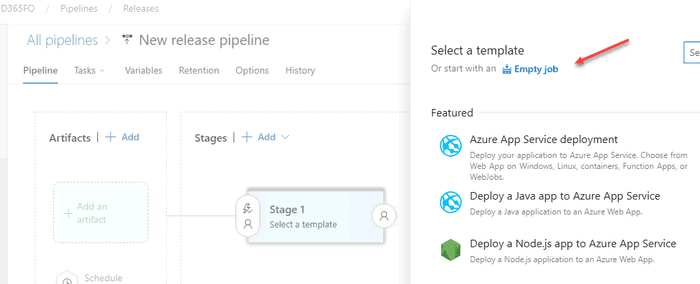
Open Pipeline > Releases and create a new pipeline based on the Empty job.
-
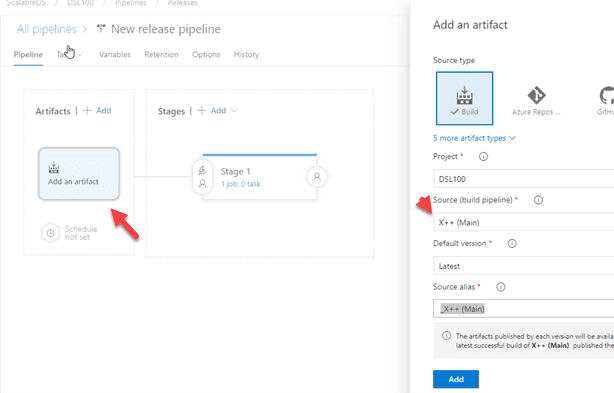
Add a new artifact
-
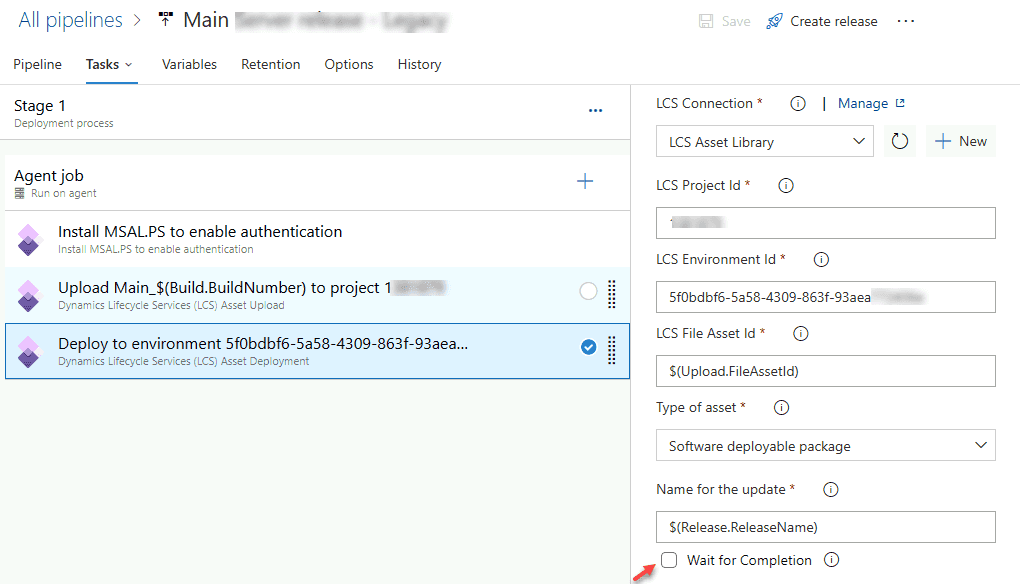
Add the Install MSAL.PS to enable authentication task.
-
Add the Dynamics Lifecycle Services (LCS) Asset Upload task.
In this task create a new Connection:
- UserId: svc_Dev_LCS@xxx.onmicrosoft.com (service account, no MFA)
- Application (Client) ID: 2eb122fa-a3d0-4a15-b2ff-a8b0339xxxxx
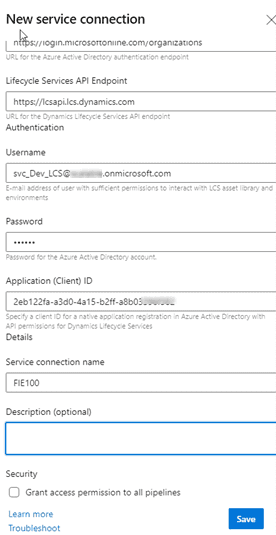
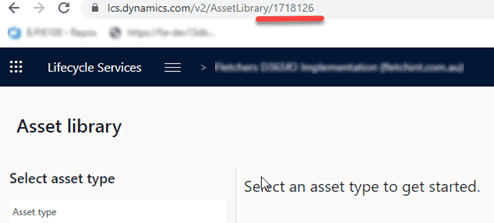
Project ID:
File to upload: Select a file and replace its name:
$(System.DefaultWorkingDirectory)/_X++ (Main)/drop/AXDeployableRuntime_22.04.07.1.zip
with
$(System.DefaultWorkingDirectory)/X++ (Main)/drop/AXDeployableRuntime$(Build.BuildNumber).zip
Reference name: Upload
LCS Asset name: AppRelease$(Build.BuildNumber)
LCS Asset Description: $(Release.ReleaseDescription)
-
Add the Dynamics Lifecycle Services (LCS) Asset Deployment task
Specify LCS File Asset Id: $(Upload.FileAssetId)
Untick Wait for Completion to prevent timeouts.

Summary
This post provides a detailed guide for setting up Dynamics 365 Finance and Operations Build and Release pipelines. I intend to keep this guide up-to-date, so please report any issues you encounter.
Hope you find this guide useful. Stay updated by following me on LinkedIn or twitter .
Tagged with:
Written by Denis Trunin
Similar posts: